Install Maven for Eclipse
1. Introduction
No ADS
This document is based on:
Eclipse 4.5 MARS (or newer)
The objective of the document:
I will show you two ways to interact with Maven and Eclipse:
- Method 1: Install Maven as embed program into Eclipse.
- Method 2: Install Maven independently on Windows and declare it so that Eclipse can use it.
After you've installed Maven, you can read document using Maven for beginners:
2. Check your Eclipse in order to see whether it installs Maven or not.
No ADS
First of all, check your Eclipse in order to see whether it installs Maven or not.
- File/New/Other..
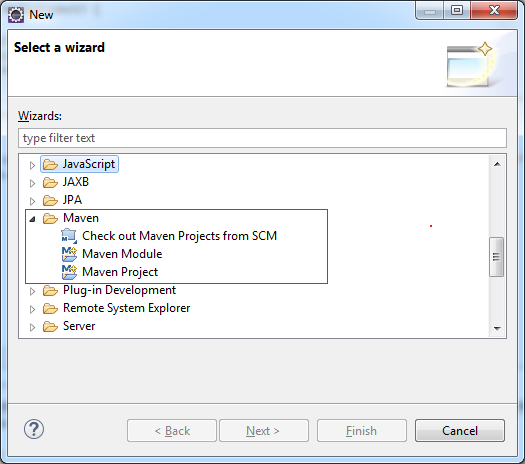
If Maven Wizard exists, it means your Eclipse has been installed with Maven Plugin, and it is ready to work. However, you still can re-install its latest version if you want.
3. Install Maven into Eclipse as Embed Program
No ADS
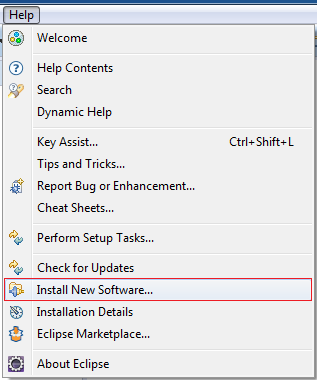
Enter:
- Name: m2e
- Location: http://download.eclipse.org/technology/m2e/releases
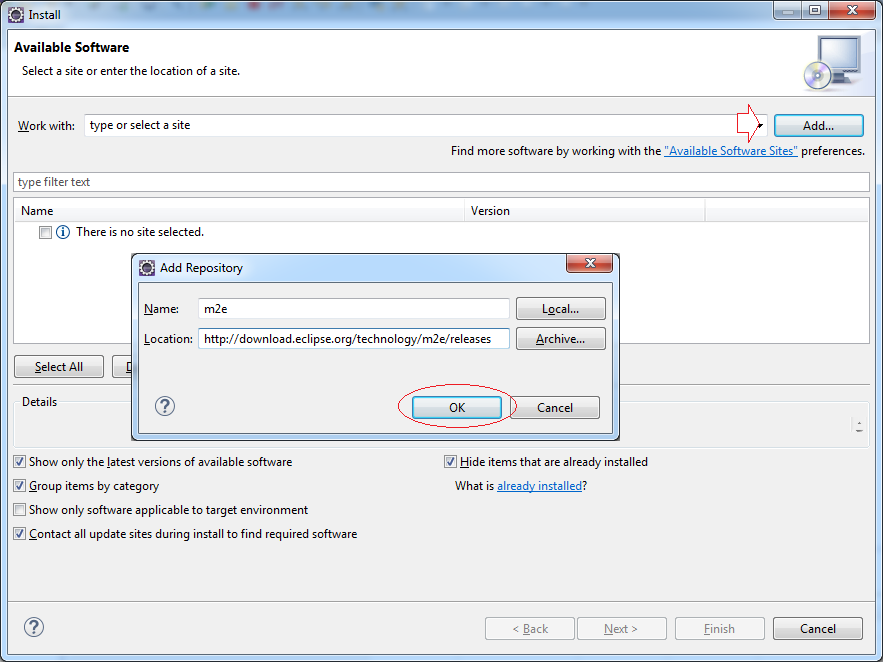
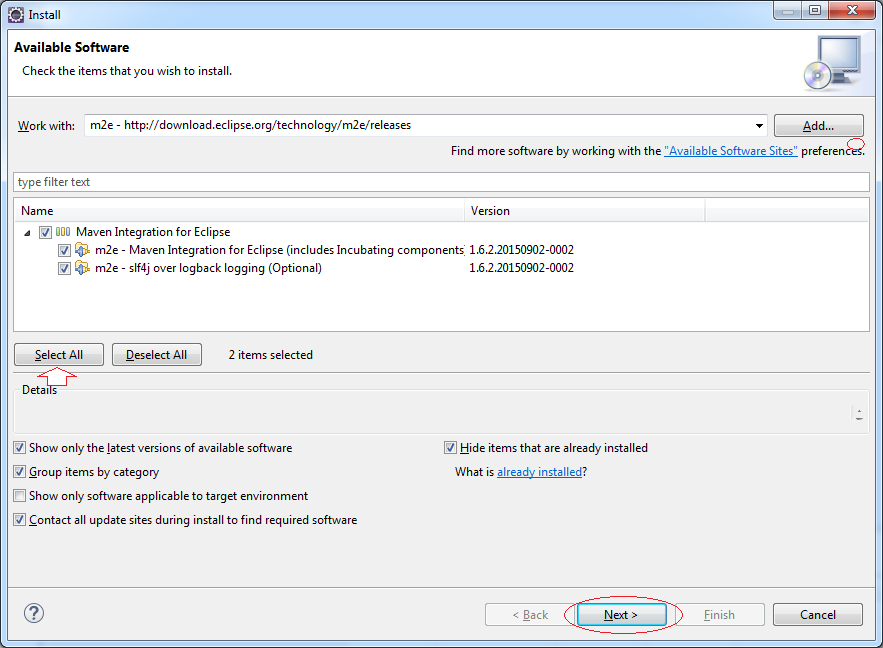
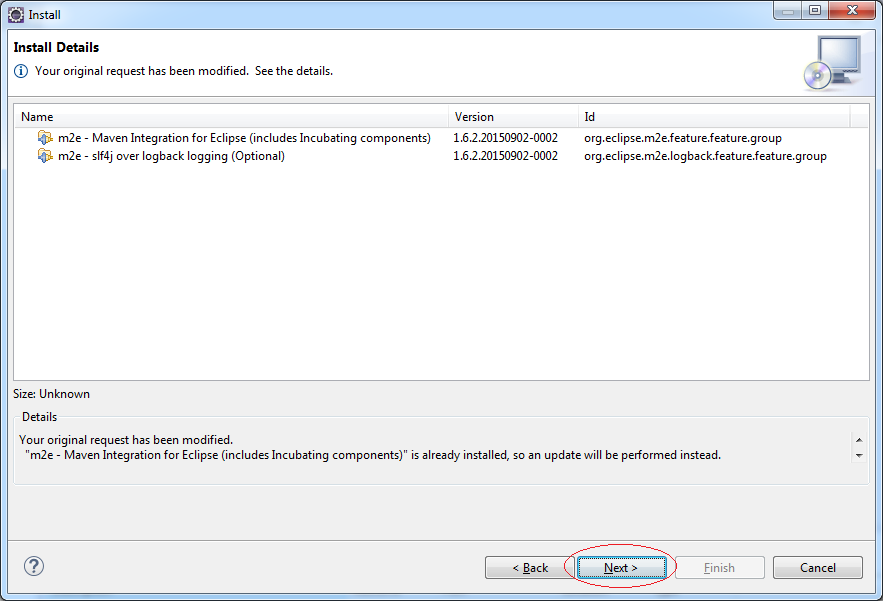
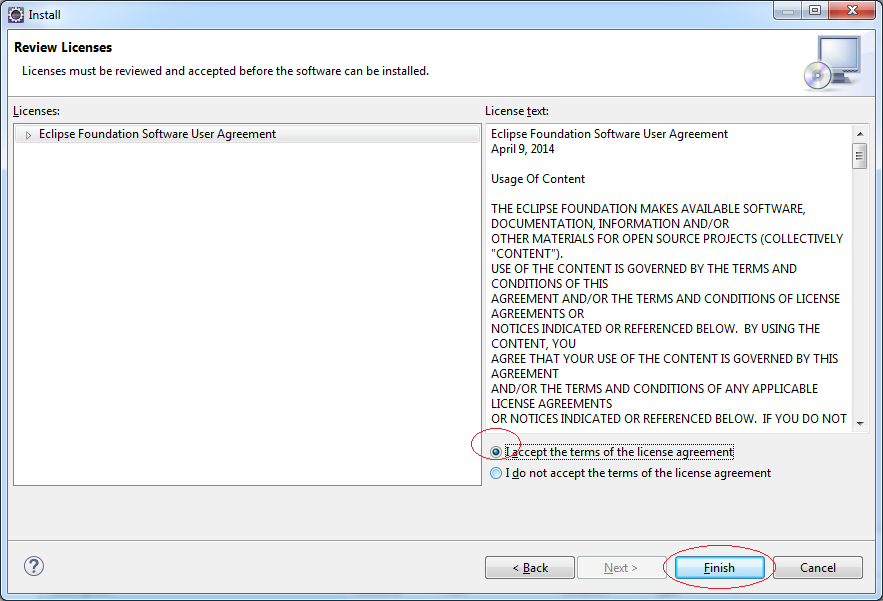
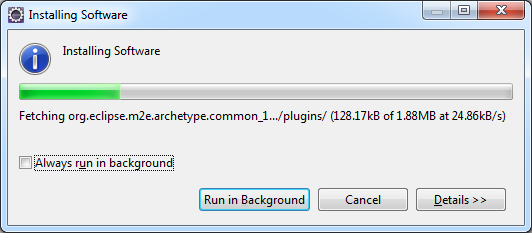

You have successfully installed Maven into Eclipse, restart Eclipse.
4. Install Independently Maven outside Eclipse
No ADS
Download Maven
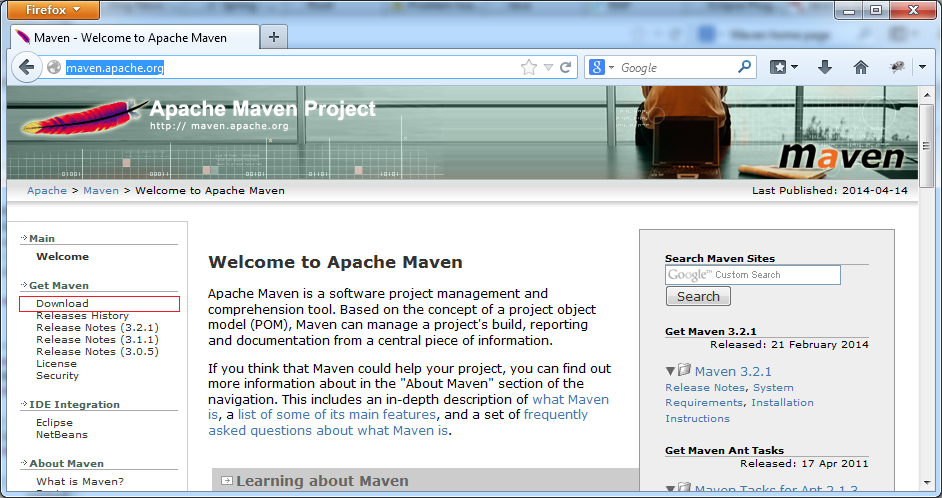
This document is based on the latest 3.3.3 Maven version, so we are going to download and use this version.
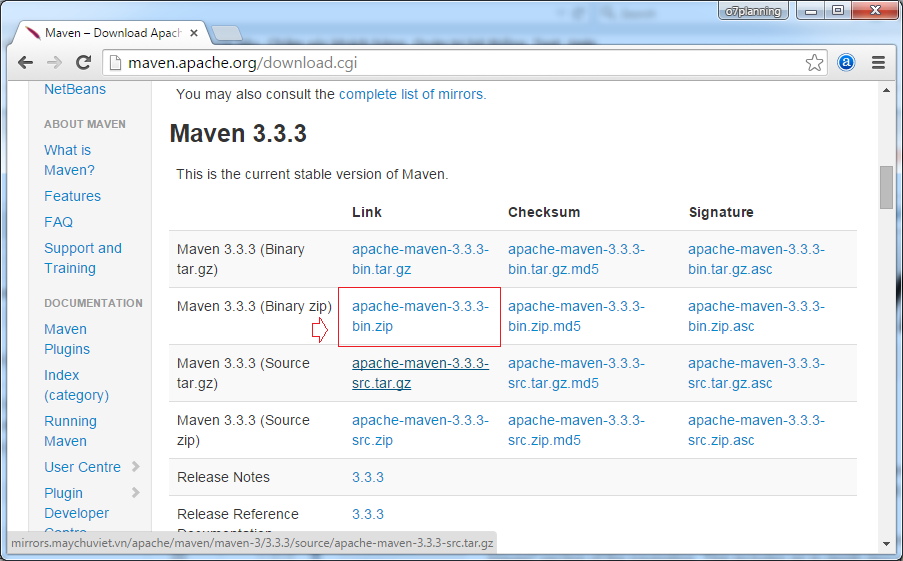
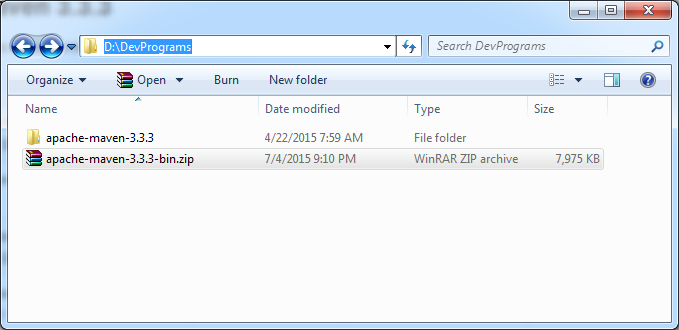
After the Maven is downloaded completely, you can extract and save the zip file on a specific folder of the hard drive.
You can see an example as below:
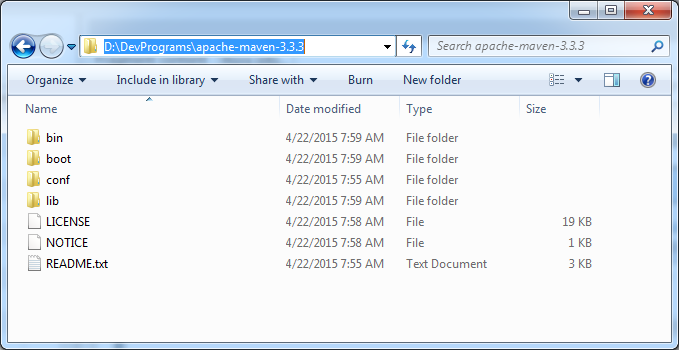
You can see an example as below:
- D:/DevPrograms/apache-maven.3.3.3
This is an extracting result on hard drive
Setup Environment variables
The next step is declaration an environmental variable to maven. These pictures as below are based on Windows 7, and the other Windows operating systems are similar.
They are included the environmental variable and declared to Path
- JAVA_HOME=C:\DevPrograms\Java\jdk1.8.0_40
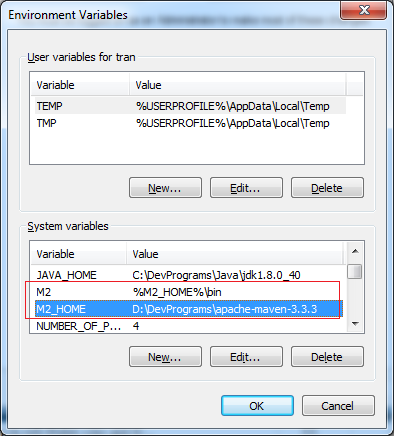
- M2_HOME=D:\DevPrograms\apache-maven-3.3.3
- M2=%M2_HOME%\bin
- Path=;%M2%;%JAVA_HOME%\bin
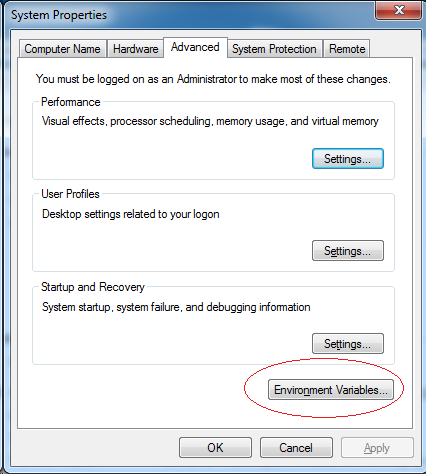
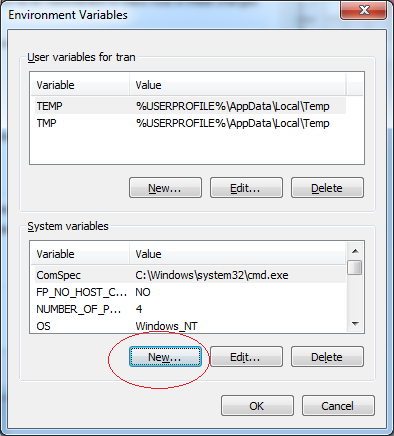
Please check to make sure that you do not declare the JAVA_HOME environmental variable, then add it.
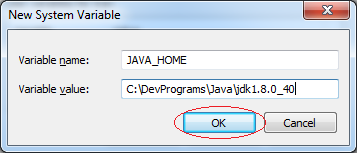
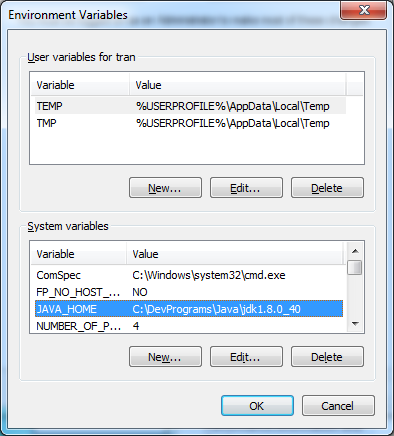
Similarly, you can declare to two other environmental variables.
Finally, append to the value of the Path environmental variable as below :
- ;%M2%;%JAVA_HOME%\bin
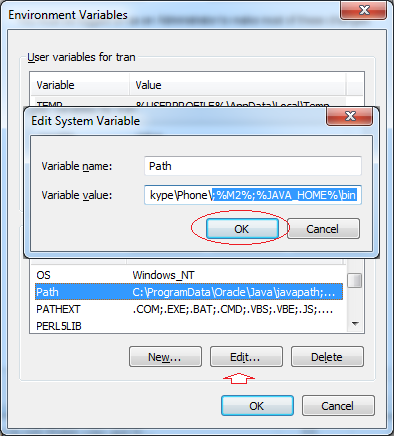
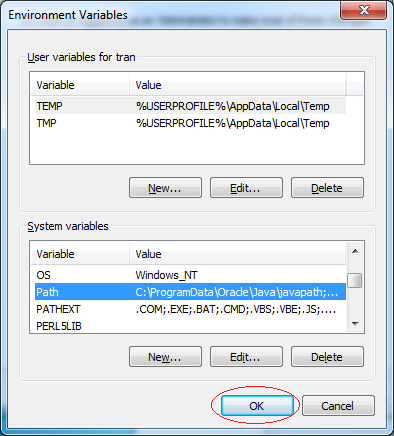
Next, check your environmental declarations. You'd better restart or "log off" your computer.
Open a command window and type the command:
- mvn --version
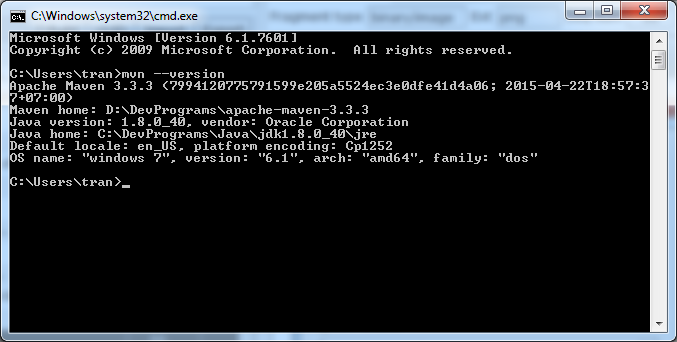
Declare setup location Maven on Eclipse
Open a folder:
- D:\DevPrograms\apache-maven-3.3.3\conf
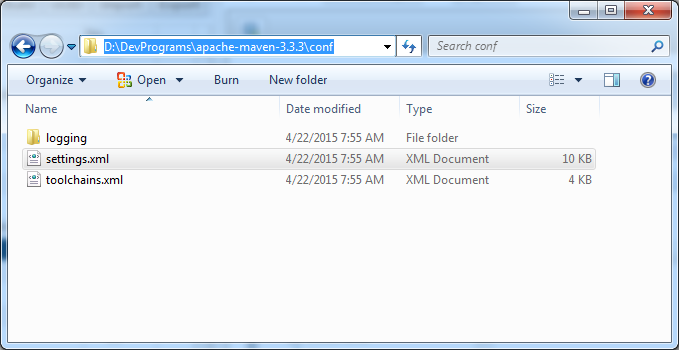
Open the settings.xml file to change some parameters.
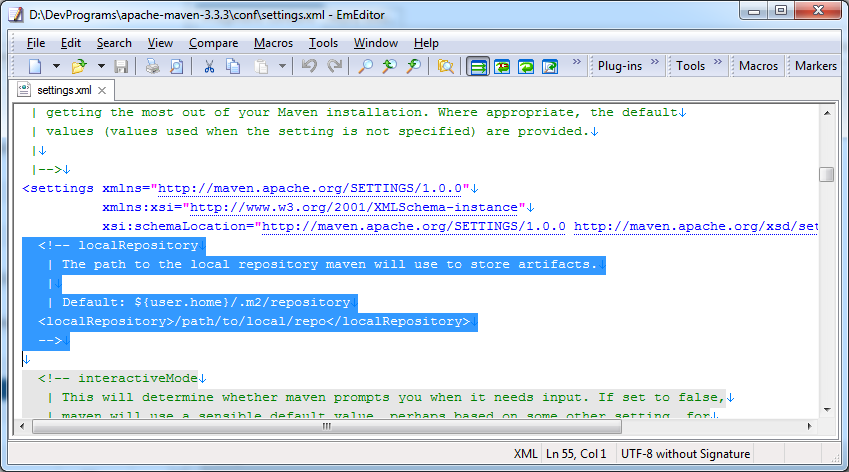
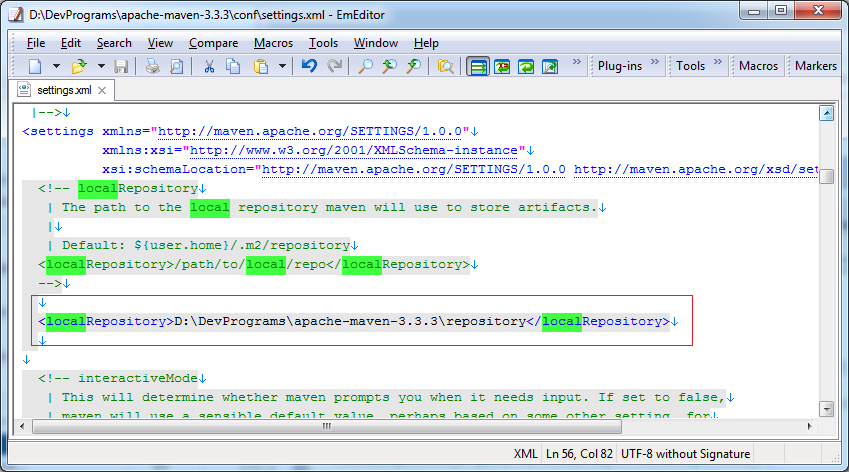
Then add:
- <localRepository>D:\DevPrograms\apache-maven-3.3.3\repository</localRepository>
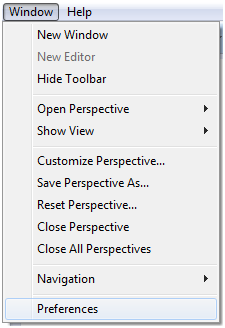
Open Window/Reference on Eclipse.
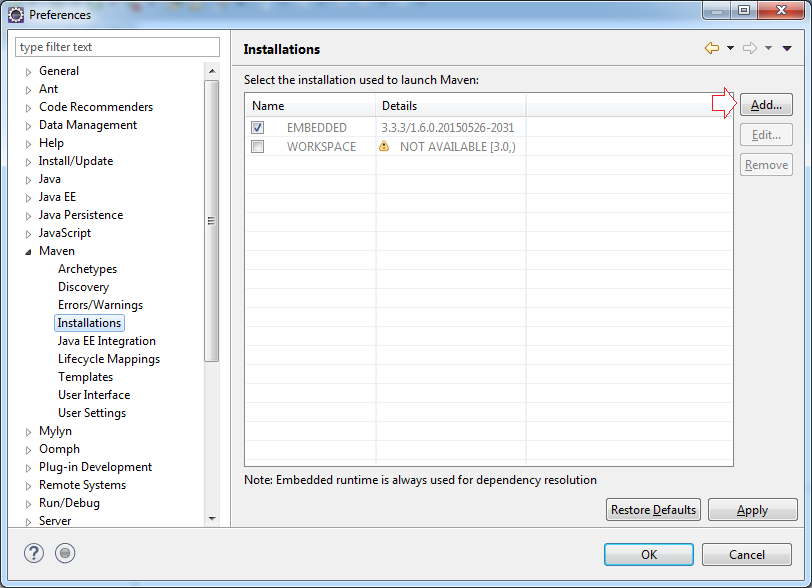
Click "Add" to add a new profile.
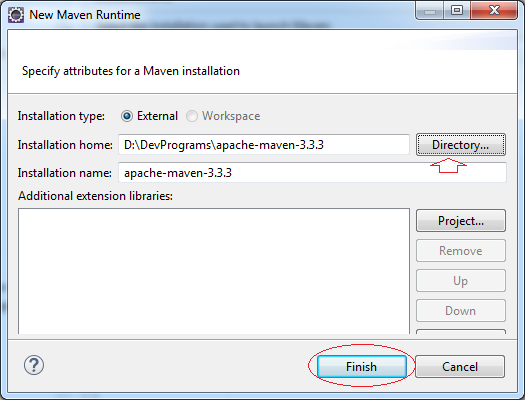
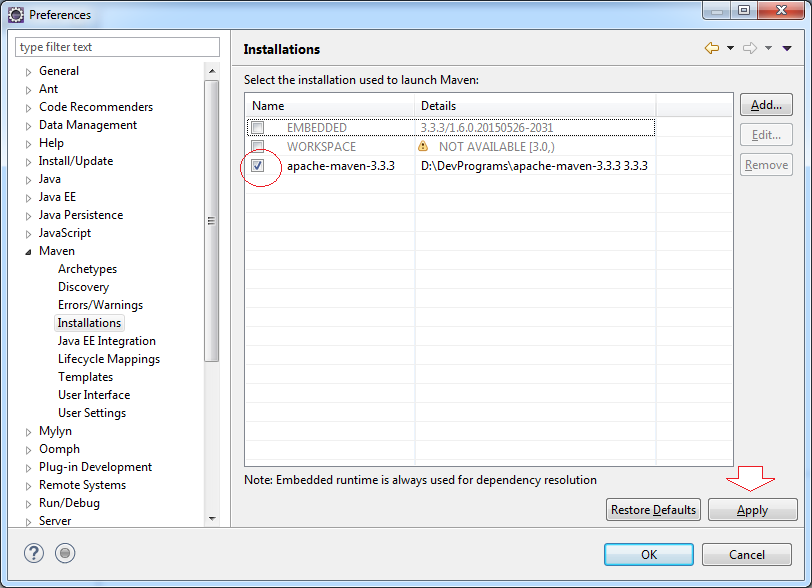
Next, declare the position of the Maven configuration file which was changed last time .
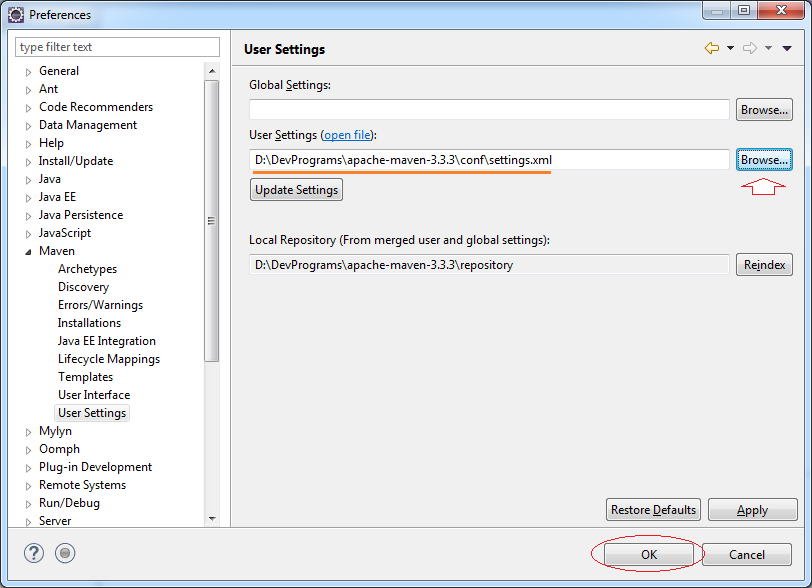
The Maven installation into Eclipse is completed.
No ADS
Eclipse Plugin Tools
- Install Subversive Plugin for Eclipse
- Install Tycho for Eclipse
- Install JBoss Tools for Eclipse
- Install AspectJ development tools for Eclipse
- Install C/C++ Development Tooling for Eclipse
- Install Ruby Development Tools for Eclipse
- Install Maven for Eclipse
- Install Web Tools Platform for Eclipse
- Install Spring Tool Suite for Eclipse
- Install BIRT Report Tools for Eclipse
- Install Jaspersoft studio for Eclipse - Visual design tool for JasperReports
- Install WindowBuilder for Eclipse
- Install RAP e4 Tooling for Eclipse
- Install e4 Tools Developer Resources for Eclipse
- Install RAP Tools for Eclipse
- Install EMF for Eclipse
- Install GEF for Eclipse
Show More
Maven Tutorials
- Install Maven for Eclipse
- Maven Tutorial for Beginners
- Maven Manage Dependencies
- Build a Multiple Module Project with Maven
- Run Maven Java Web Application in Tomcat Maven Plugin
- Run Maven Java Web Application in Jetty Maven Plugin
- Install Tycho for Eclipse
- Create Java OSGi project with Maven and Tycho
- Create an Empty Maven Web App project in Eclipse
- OSGi and AspectJ integration
Show More
