Use Logging in Spring Boot
1. The objective of the lesson
No ADS
"Logging" is simply understood to be "recording" the problems during operation of applications. The problems herein are errors, warnings and other information,.... This information can be displayed on Console screen or recorded in files.
When you run the Spring Boot application directly onEclipse, you can see information on Console window. This information show you the state of the application, errors occurring during running application. That is Logging!.
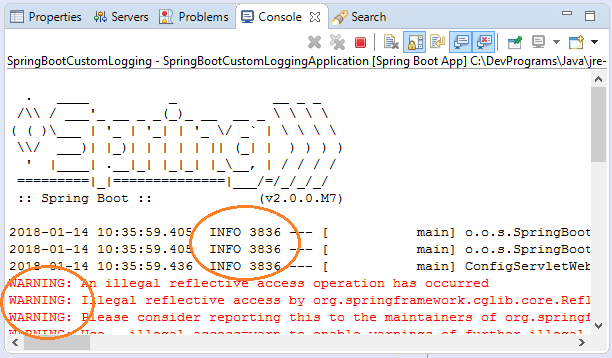
There are many different Logging libraries such as Logback, Log4j2, JUL,.. Spring Boot can work with these libraries. By default, Spring Boot has automatically configured and used the Logback library for its logging, and you don't need any more configurations, except you want to customize some arguments. The customizations herein can be specifying file name to write information, pattern, ...
In this lesson,we are going to discuss the operation principle of Logback in Spring Boot application, and learn about customizing way for Logback.
The properties can be customized by you:
logging.config
logging.exception-conversion-word
logging.file
logging.level.*
logging.path
logging.pattern.console
logging.pattern.file
logging.pattern.level
logging.register-shutdown-hook
2. Create a Spring Boot project
On Eclipse, create a Spring Boot project.
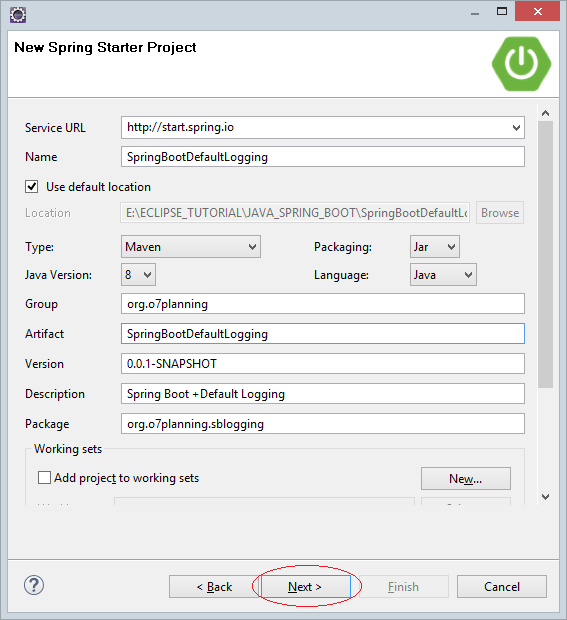
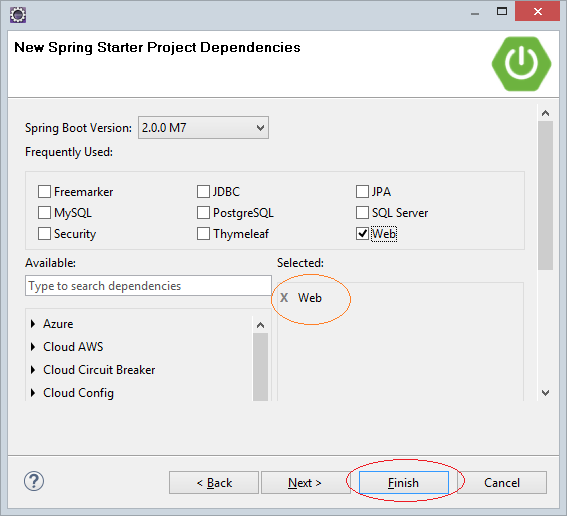
To use Logging, you need to use one of the following "Starters" :
- spring-boot-starter-logging
- spring-boot-starter-web
pom.xml
<?xml version="1.0" encoding="UTF-8"?>
<project xmlns="http://maven.apache.org/POM/4.0.0"
    xmlns:xsi="http://www.w3.org/2001/XMLSchema-instance"
    xsi:schemaLocation="http://maven.apache.org/POM/4.0.0
    http://maven.apache.org/xsd/maven-4.0.0.xsd">

    <modelVersion>4.0.0</modelVersion>

    <groupId>org.o7planning</groupId>
    <artifactId>SpringBootDefaultLogging</artifactId>
    <version>0.0.1-SNAPSHOT</version>
    <packaging>jar</packaging>

    <name>SpringBootDefaultLogging</name>
    <description>Spring Boot +Default Logging</description>

    <parent>
        <groupId>org.springframework.boot</groupId>
        <artifactId>spring-boot-starter-parent</artifactId>
        <version>2.0.0.RELEASE</version>
        <relativePath/> <!-- lookup parent from repository -->
    </parent>

    <properties>
        <project.build.sourceEncoding>UTF-8</project.build.sourceEncoding>
        <project.reporting.outputEncoding>UTF-8</project.reporting.outputEncoding>
        <java.version>1.8</java.version>
    </properties>

    <dependencies>
        <dependency>
            <groupId>org.springframework.boot</groupId>
            <artifactId>spring-boot-starter-web</artifactId>
        </dependency>

        <dependency>
            <groupId>org.springframework.boot</groupId>
            <artifactId>spring-boot-starter-test</artifactId>
            <scope>test</scope>
        </dependency>
    </dependencies>

    <build>
        <plugins>
            <plugin>
                <groupId>org.springframework.boot</groupId>
                <artifactId>spring-boot-maven-plugin</artifactId>
            </plugin>
        </plugins>
    </build>

</project>
MainController.java
package org.o7planning.sblogging.controller;

import org.springframework.stereotype.Controller;
import org.springframework.web.bind.annotation.RequestMapping;
import org.springframework.web.bind.annotation.ResponseBody;

import org.slf4j.Logger;
import org.slf4j.LoggerFactory;

@Controller
public class MainController {

    private static final Logger LOGGER = LoggerFactory.getLogger(MainController.class);

    @ResponseBody
    @RequestMapping(path = "/")
    public String home() {

        LOGGER.trace("This is TRACE");
        LOGGER.debug("This is DEBUG");
        LOGGER.info("This is INFO");
        LOGGER.warn("This is WARN");
        LOGGER.error("This is ERROR");

        return "Hi, show loggings in the console or file!";
    }

}
Run your application directly on Spring Boot, and then visit the following link:
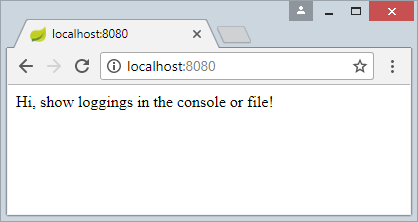
On the Console window of Eclipse, you can see the Logs information as follows:
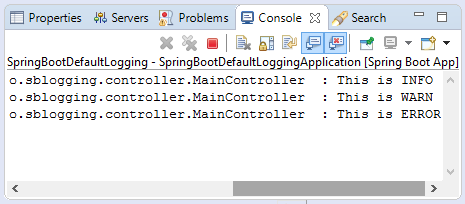
2018-01-14 13:21:57.593  INFO 7980 --- [nio-8080-exec-6] o.o.sblogging.controller.MainController  : This is INFO
2018-01-14 13:21:57.593  WARN 7980 --- [nio-8080-exec-6] o.o.sblogging.controller.MainController  : This is WARN
2018-01-14 13:21:57.593 ERROR 7980 --- [nio-8080-exec-6] o.o.sblogging.controller.MainController  : This is ERROR
3. Logging Level
No ADS
Based on the severity of problem, Logback divides the information to be recorded into 5 Levels, the least severity is TRACE, and the most severity is ERROR. Note: Some Logging libraries divide the information to be recorded into 7 different levels.
- TRACE
- DEBUG
- INFO
- WARN
- ERROR
- FATAL
- OFF
By default, Spring Boot record only information with the severity of INFO or higher
# Default:

logging.level.root=INFO
Change the Logging Level in application.properties:
* application.properties *
logging.level.root=WARN

# ..
Rerun your application, and see the information written on the Console window:
2018-01-14 17:45:50.341  WARN 8500 --- [nio-8080-exec-1] o.o.sblogging.controller.MainController  : This is WARN
2018-01-14 17:45:50.342 ERROR 8500 --- [nio-8080-exec-1] o.o.sblogging.controller.MainController  : This is ERROR
4. Logging File
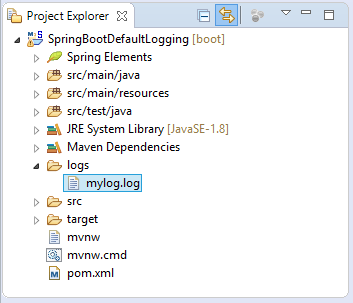
Default logging information is written on Console screen, however, you can configure so that they are written in files.
* application.properties *
logging.file=logs/mylog.logRerun your application directly on Eclipse, then access the following link:
Then refresh project again, you can see the logging file created.
5. Logging Pattern
No ADS
Log records are written in a pattern. Below is a default pattern:
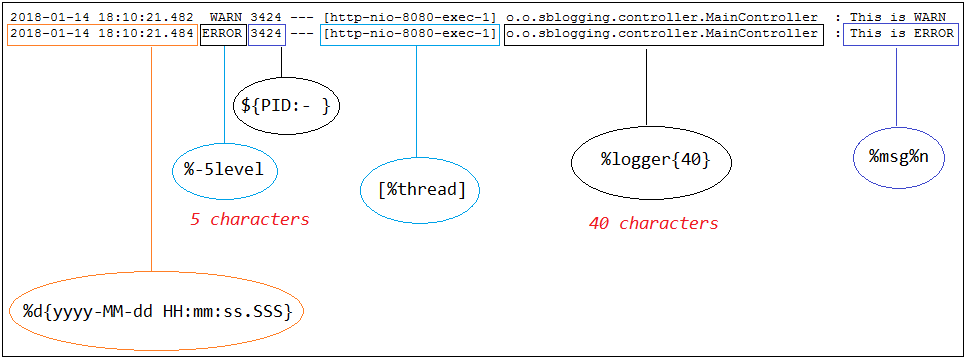
And you can change "Logging pattern" by customizing the following properties:
- logging.pattern.console
- logging.pattern.file
# Pattern:

logging.pattern.console= %d{yyyy-MMM-dd HH:mm:ss.SSS} %-5level [%thread] %logger{15} - %msg%n

# Output:

2018-Jan-17 01:58:49.958 WARN  [http-nio-8080-exec-1] o.o.s.c.MainController - This is WARN
2018-Jan-17 01:58:49.960 ERROR [http-nio-8080-exec-1] o.o.s.c.MainController - This is ERROR
# Pattern:
logging.pattern.console= %d{dd/MM/yyyy HH:mm:ss.SSS} %-5level [%thread] %logger{115} - %msg%n
# Output:
17/01/2018 02:15:15.052 WARN [http-nio-8080-exec-1] org.o7planning.sblogging.controller.MainController - This is WARN
17/01/2018 02:15:15.054 ERROR [http-nio-8080-exec-1] org.o7planning.sblogging.controller.MainController - This is ERROR# Pattern:
logging.pattern.console=%d{yy-MMMM-dd HH:mm:ss:SSS} %5p %t %c{2}:%L - %m%n
# Output:
18-January-17 02:21:20:317 WARN http-nio-8080-exec-1 o.o.s.c.MainController:22 - This is WARN
18-January-17 02:21:20:320 ERROR http-nio-8080-exec-1 o.o.s.c.MainController:23 - This is ERRORNo ADS
Spring Boot Tutorials
- Deploy Spring Boot Application on Oracle WebLogic Server
- Create a User Registration Application with Spring Boot, Spring Form Validation
- Spring Boot File Upload Example
- Spring Boot and Groovy Tutorial with Examples
- Spring Boot and MongoDB Tutorial with Examples
- Spring Boot, Hibernate and Spring Transaction Tutorial with Examples
- Spring Boot and Spring Data JPA Tutorial with Examples
- Secure Spring Boot RESTful Service using Auth0 JWT
- Spring Email Tutorial with Examples
- Spring Boot, Apache Tiles, JSP Tutorial with Examples
- Create a Login Application with Spring Boot, Spring Security, JPA
- Use Twitter Bootstrap in Spring Boot
- Spring Tutorial for Beginners
- Spring Boot Interceptors Tutorial with Examples
- Create a Login Application with Spring Boot, Spring Security, Spring JDBC
- Spring Boot File Upload with jQuery Ajax Example
- Spring Boot and JSP Tutorial with Examples
- Install Spring Tool Suite for Eclipse
- Spring Boot, JPA and Spring Transaction Tutorial with Examples
- Spring Boot and Thymeleaf Tutorial with Examples
- Integrating Spring Boot, JPA and H2 Database
- Spring Boot File Upload with AngularJS Example
- Fetch data with Spring Data JPA DTO Projections
- Use Multiple DataSources with Spring Boot and JPA
- CRUD Example with Spring Boot, REST and AngularJS
- Spring Boot and Mustache Tutorial with Examples
- Spring JDBC Tutorial with Examples
- Install a free Let's Encrypt SSL certificate for Spring Boot
- Spring Boot Tutorial for Beginners
- Spring Boot Common Properties
- Spring Boot, Spring JDBC and Spring Transaction Tutorial with Examples
- Use multiple ViewResolvers in Spring Boot
- Deploy Spring Boot Application on Tomcat Server
- Configure Spring Boot to redirect HTTP to HTTPS
- Example of OAuth2 Social Login in Spring Boot
- Create a simple Chat application with Spring Boot and Websocket
- Use Multiple DataSources with Spring Boot and RoutingDataSource
- Spring Boot and FreeMarker Tutorial with Examples
- Create a Shopping Cart Web Application with Spring Boot, Hibernate
- Spring Boot Restful Client with RestTemplate Example
- Secure Spring Boot RESTful Service using Basic Authentication
- Spring Boot File Download Example
- CRUD Restful Web Service Example with Spring Boot
- Create a Multi Language web application with Spring Boot
- Use Logging in Spring Boot
- Run background scheduled tasks in Spring
- Application Monitoring with Spring Boot Actuator
Show More