Deploy Spring Boot Application on Tomcat Server
1. Objective of post
No ADS
In this post, I will guide you for implementing a Spring Boot application on Tomcat Server. One of the characteristics of the Tomcat is compact. The capacity of theTomcat is only about 10MB, and an open source Java Web Server.

Ensure that you have installed the Tomcat successfully. If not, you can refer to Tomcat installations as in the following post:
In fact, the Spring Boot application can be packaged into an Executable JAR file. With this file you can run the application directly without needing to deploy it on any Web Server. The Executable JAR file may not be compatible with all Web servers, therefore, you want to deploy it on a particular Web server, you need to package the Spring Boot application into a WAR file.
2. Edit code
No ADS
I have a Spring Boot project here, developed by Eclipse IDE. When creating the Spring Boot project, you have 2 choices to pack this project such as WAR or JAR.
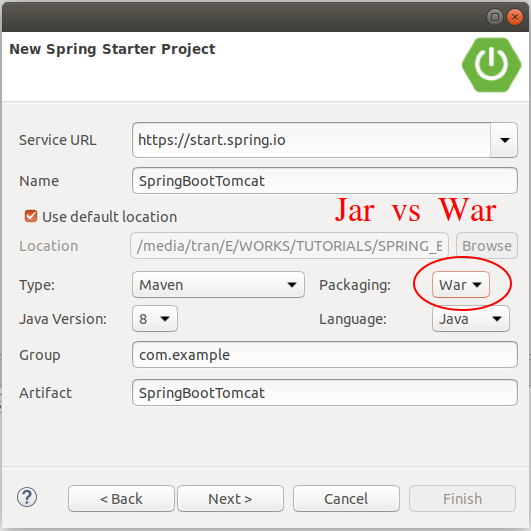
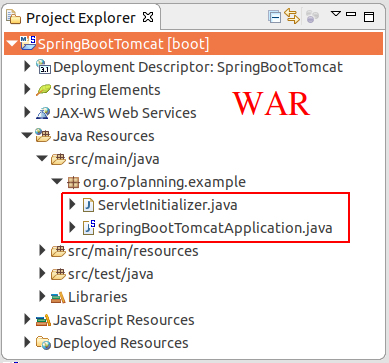
When you create the Spring Boot project with the "Packaging = War" option, Eclipse will create 2 classes such as "AbcApplication & ServletInitializer" for you. The WAR files are suitable for being deployed on Web Servers.
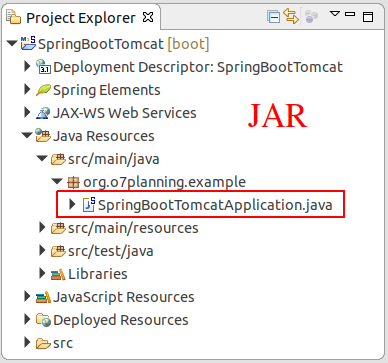
While, if you create a Spring Boot project with the "Packaging = Jar" choice, only one AbcApplication class will be created. When the Spring Boot application is packed into the JAR file, it can be independently executabe without being deployed on any Web Server. But the JAR file is not suitable to be deployed on Web Servers.
WAR File.
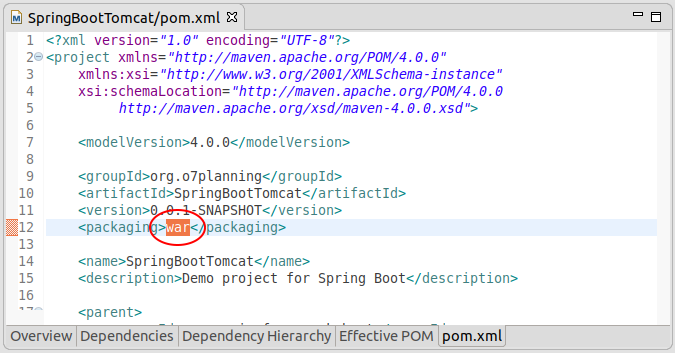
If you have an available Spring Boot, you need to correct packaging method into WAR:
On the Eclipse, open the pom.xml file, and change packaging method into war.
If your project doesn't have a ServletInitializer class, create it.
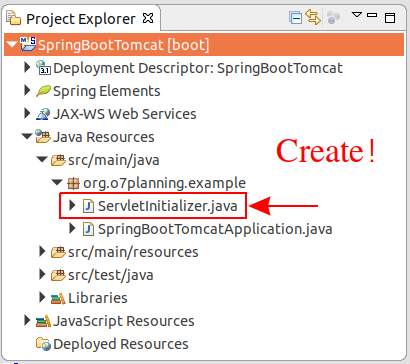
ServletInitializer.java
package org.o7planning.example;

import org.springframework.boot.builder.SpringApplicationBuilder;
import org.springframework.boot.web.servlet.support.SpringBootServletInitializer;

public class ServletInitializer extends SpringBootServletInitializer {

    @Override
    protected SpringApplicationBuilder configure(SpringApplicationBuilder application) {
        return application.sources(SpringBootTomcatApplication.class);
    }

}
Add the following configuration snippet to the pom.xml:
** pom.xml **
<dependency>
    <groupId>org.springframework.boot</groupId>
    <artifactId>spring-boot-starter-tomcat</artifactId>
    <scope>provided</scope>
</dependency>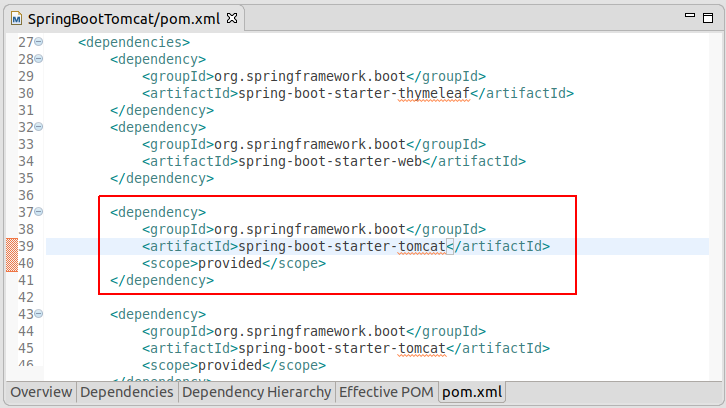
If there are more than one Application class in your project, please tell the Spring Boot which class will be used for your application.
** pom.xml **
<properties>
        <start-class>org.o7planning.example.OtherSpringBootWebApplication</start-class>
</properties>
3. Install Spring Boot
No ADS
In the next step, you need to use Maven to create WAR file. You have to ensure that your Eclipse is using JDK instead of JRE. If not, en error will occur in this process.
Right click on the Project and select:
Run As/Maven Install
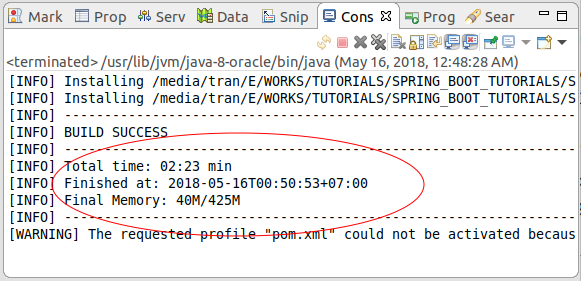
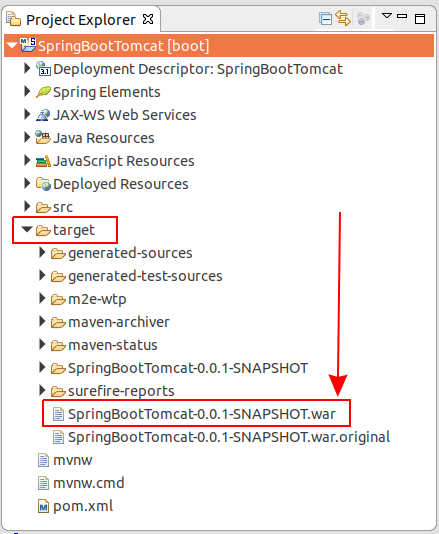
At this moment, you will have a WAR file in the target folder of the project, you can use this file to deploy on the Tomcat Server.
See also:
No ADS
Java Application Servers Tutorials
- Install Tomcat Server for Eclipse
- Install Tomcat Server
- Install Glassfish Web Server on Windows
- Install Oracle WebLogic Server
- How to create Windows Service for Oracle WebLogic Server?
- Deploy Spring Boot Application on Tomcat Server
- Deploy Spring Boot Application on Oracle WebLogic Server
- Deploy Spring MVC on Oracle WebLogic Server
- Install SSL Certificate for Tomcat Server
- Install a free SSL certificate Let's Encrypt for Tomcat Server on Ubuntu
Show More
Spring Boot Tutorials
- Deploy Spring Boot Application on Oracle WebLogic Server
- Create a User Registration Application with Spring Boot, Spring Form Validation
- Spring Boot File Upload Example
- Spring Boot and Groovy Tutorial with Examples
- Spring Boot and MongoDB Tutorial with Examples
- Spring Boot, Hibernate and Spring Transaction Tutorial with Examples
- Spring Boot and Spring Data JPA Tutorial with Examples
- Secure Spring Boot RESTful Service using Auth0 JWT
- Spring Email Tutorial with Examples
- Spring Boot, Apache Tiles, JSP Tutorial with Examples
- Create a Login Application with Spring Boot, Spring Security, JPA
- Use Twitter Bootstrap in Spring Boot
- Spring Tutorial for Beginners
- Spring Boot Interceptors Tutorial with Examples
- Create a Login Application with Spring Boot, Spring Security, Spring JDBC
- Spring Boot File Upload with jQuery Ajax Example
- Spring Boot and JSP Tutorial with Examples
- Install Spring Tool Suite for Eclipse
- Spring Boot, JPA and Spring Transaction Tutorial with Examples
- Spring Boot and Thymeleaf Tutorial with Examples
- Integrating Spring Boot, JPA and H2 Database
- Spring Boot File Upload with AngularJS Example
- Fetch data with Spring Data JPA DTO Projections
- Use Multiple DataSources with Spring Boot and JPA
- CRUD Example with Spring Boot, REST and AngularJS
- Spring Boot and Mustache Tutorial with Examples
- Spring JDBC Tutorial with Examples
- Install a free Let's Encrypt SSL certificate for Spring Boot
- Spring Boot Tutorial for Beginners
- Spring Boot Common Properties
- Spring Boot, Spring JDBC and Spring Transaction Tutorial with Examples
- Use multiple ViewResolvers in Spring Boot
- Deploy Spring Boot Application on Tomcat Server
- Configure Spring Boot to redirect HTTP to HTTPS
- Example of OAuth2 Social Login in Spring Boot
- Create a simple Chat application with Spring Boot and Websocket
- Use Multiple DataSources with Spring Boot and RoutingDataSource
- Spring Boot and FreeMarker Tutorial with Examples
- Create a Shopping Cart Web Application with Spring Boot, Hibernate
- Spring Boot Restful Client with RestTemplate Example
- Secure Spring Boot RESTful Service using Basic Authentication
- Spring Boot File Download Example
- CRUD Restful Web Service Example with Spring Boot
- Create a Multi Language web application with Spring Boot
- Use Logging in Spring Boot
- Run background scheduled tasks in Spring
- Application Monitoring with Spring Boot Actuator
Show More